Ever deal with a leak under your sink? The leak may go undetected for a while because they are commonly buried deep at the back of a seldom-used cabinet. By the time the leak is discovered, the water damage can be a costly mess. It’s best to get your local plumber on board once it gets to that point, so don’t let a leak under the sink dampen your mood — be proactive and take the necessary steps to ensure a little leak problem doesn’t turn into a big one. Once you figure out where the leak is coming from, it’s usually an easy fix if you catch it in time. Here’s what you need to do.
First, Find the Leak
It’s a good idea to routinely peek into the cabinets under your sinks to check for moisture. That way, if there is a leak, you can catch it early and avoid a bigger headache. Now you need to figure out where it’s coming from.
Supply Valve Leaks
Many sink leaks occur at the shutoff valves and supply connections. The tubing that connects the sink to the water supply is called the “supply.” For most sinks and tubs, the supply tubes are built into their valves and then fastened directly onto the water supply pipes:
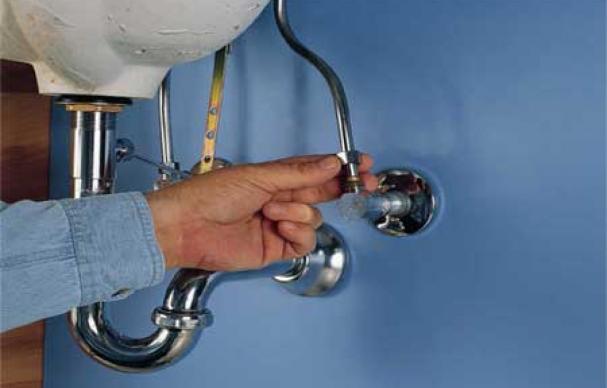
Wipe the supply tubing, the connections, and the shutoff valves with tissue or paper towel. If the paper comes away wet, you’ve probably found your leak. Most of the time, repairing the leak is simply a matter of tightening the packing nut or the compression nut on the valve. If you’ve tightened the nuts on the valve but it’s still leaking, you may need to replace the valve entirely. It also might help to remove the fittings completely and apply some pipe putty to the threads or wrap the threads with sealing tape.
Drain Leaks
If the leak isn’t in the valves or supply, the drain might be leaking. Fill the sink with water. Then, as the water drains, inspect every inch of piping connecting the sink to the wall, especially the slip joints:
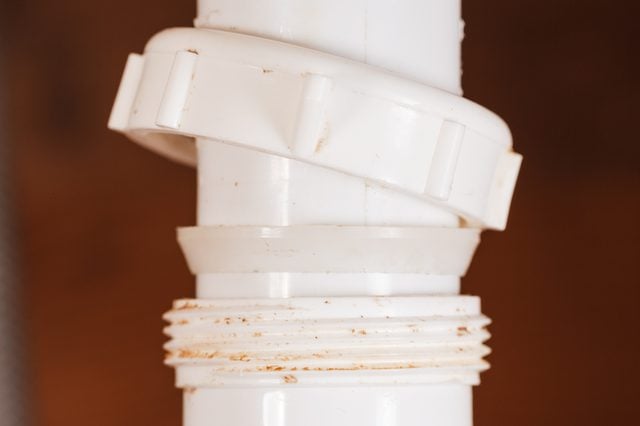
Use some dry tissue or paper towel to wipe the outside of the pipes. If the paper gets wet, you’ve found your leak. For a slip joint, it may just be a matter of making sure it’s aligned properly and that it’s tight enough. If the joint still leaks, take it apart and apply pipe putty to the washer. If the leak is at the basket strainer, tighten the basket strainer to see if that stops the leak. If the basket strainer still leaks, take it apart and apply pipe putty.
Rim and Faucet Leaks
The upper part of a sink basin (the “bowl part” of the sink) that rests on the counter top is called the rim. If not properly sealed, water can leak through the the space between the rim and the counter top and into the cabinet below. The damage that may do to your counter top can be extensive — in fact, you might need to replace your counter tops if you don’t catch it in time. Check for a rim leak by spilling some water around the sink rim, then looking in the cabinet below to see if there’s any leakage. If you’re dealing with a rim leak, you’ll need to remove the old caulk and re-caulk the whole thing:
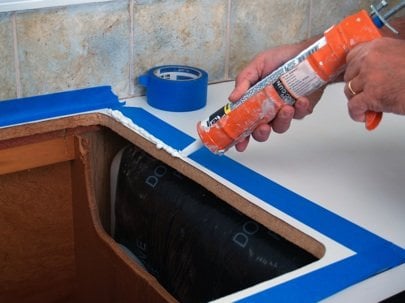
Then you can tighten the fasteners under the rim that attach the sink to the counter top. If the faucet base is leaking, tighten all the connections. If the leaking continues, it’s likely an internal leak with the faucet. We highly recommend you not take the faucet apart and apply pipe putty or sealing tape.
Call A Cape Coral Plumber If You Still Can’t Find The Leak
If you’ve done your best to locate the leak but you haven’t found it, or if you found the leak but can’t fix it, don’t let the situation get any worse. Call a professional Cape Coral or Fort Myers plumber like Avis Plumbing and Air Conditioning. It will save you money in the long run, and all you have to do is pick up the phone and call us at (239) 542-4421.




No Comment
You can post first response comment.